
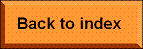
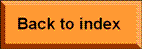
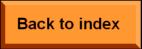
Below are the instructions to draw a button like the one above.
You can access a web page with a more complete tutorial
on this page from a university in Cambridge, Massachusetts (USA):
Lesley University
PRACTICAL EXERCISE:
Create a simple button image with Paint, to use it as a link back to the index.
Instructions
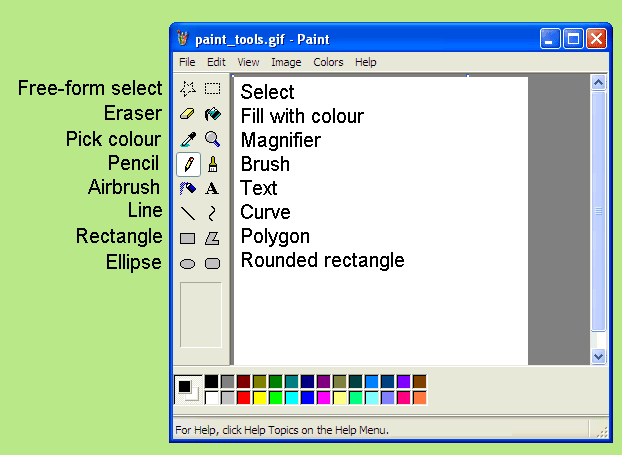
- Open Paint clicking on the Start button, then selecting All programs/Accesories/Paint.
- Adjust the sheet size for the picture you want to make:
Press CTRL+U or use the menu option Image/Attributes and select the number of pixels for the width and height of your picture.
For this button choose 400 width x 100 height.

- Select a colour you like with the left button of the mouse from the colour palette at the bottom. If you don't like any of the colours in the palette,
define a new colour. Double-click on the colour you chose in the palette to change it; then click on the Define Custom Colours button
and choose the hue (red, green and blue values, horizontally in the colour chart), saturation (vertically in the colour chart)
and lightness (lighter or darker).
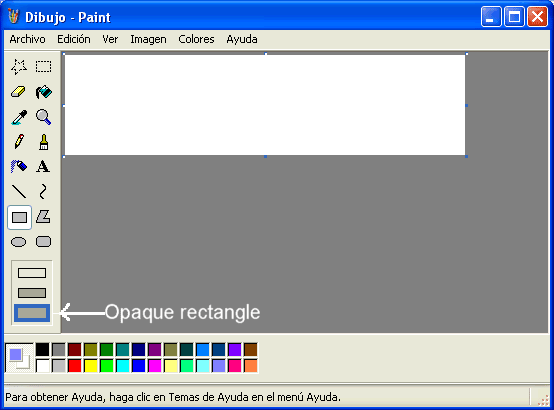
- Create an opaque rectangle with the rectangle tool (the opaque rectangle is the third option) in the centre of the image,
to get a rectangle with a wide border around it.
- Create a colour which is darker than the colour of the rectangle: double-click on the colour, click on Define Custom Colours, and move the vertical
sliding bar downwards.
- Use the Magnifier tool to see the image bigger; select the biggest size (x8).
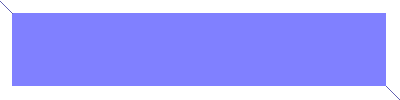
- Use the Line tool to draw two diagonals in opposite corners of the border (using the darker colour).

- Use the Fill with colour tool to fill in two sides of the border with the darker colour.

- Define a new colour which is lighter than the colour of the rectangle.
- Use the Fill with colour tool to fill in the other two sides of the border with the lighter colour.

- Use the Pick color tool and right-click on your rectangle to select its colour as the background colour.
- Select black in the colour palette with the left button for the foreground.
- Select the Text tool, click and drag to mark a big area of the button as a text box. Then write the text for your button (for example, "Go to index", or "Back to index").
- Before you press ENTER, adjust the font and font size using the text tools bar. Use a bold type.
(If you can't see the text tools bar, use the menu options See/text tools bar to make it visible.)

- Use the Select tool to select the text. Drag it to the exact centre of the button.
- Save your image as a .png or .gif file.
If you want to make your image smaller, you can use several methods (click on the magnifying glass to see it in detail):
- Use Paint: press CTRL+W or use the menu option Image / Stretch/Skew, then select a percentage to reduce your image:
- Use another program to reduce the size of an image file:
- Use a photographic edition program:
JJCC